There is nothing that’s screams “homemade” quite like a bad hem. Even a well-executed hem can ruin a garment if you don’t choose the right style for the fabric and garment. One of my neighbors went to K-mart and bought some inexpensive sheer curtains for her dining room. They were too long to be safe with a baseboard heater running under them, and she asked me to hem them shorter for her. Normally, I would have given her my “you wouldn’t ask Picasso to paint your doghouse for you” response, but she was a talented hairdresser who cut my hair for free so I owed her a couple of hems.
The manufacturer had turned under a ¼” edge on the hem and done a straight stitch across the edge. Not a bad hem on some things, but these curtains were sheer, and all of the raw edge showed through to the front of the curtains. I did a deep double fold hem, and let’s just say the curtains didn’t look like K-Mart anymore.
My mom could hem by hand like a little French nun, and I will show you (or link to a video that will show you) how she did that, but I only take the time to do a hem by hand when the fabric and the style require it. So before we get out the tiny needles and the silk thread, let’s do some hems by machine.
The Basic Blindstitch Machine Hem
A blindstitch hem is appropriate when you don’t want your hem stitches to show on the outside of your garment. Although you can do a blind hem on a curved edge, they look best when the bottom of the garment is straight. The stitches disappear best when the fabric has a looser weave or is a print. When you’re doing a blind hem on a solid color fabric with a tight weave, you want to take the time to match the thread color as closely as you can.
When designers make couture dresses, jackets, and skirts, they often put small weights in the hems to make them hang better. Coco Chanel put chains inside the hems of her famous jackets. You might have read were Queen Elizabeth is put out with Princess Kate because she doesn’t have weights sewn into her hems, and her skirts get blown about in the wind showing off a little too much royal leg. We don’t have to sew weights into our clothes, but choosing to make our hems a little deeper can add some weight to the hem and make our clothes hang down straighter if that’s the look we want. Obviously, if you want your skirt to be “flirty”, that isn’t something you would want to do. Most blind hems are 1 1/2” to 3” deep. They might be more on a full length gown.
The first step to making the blind hem is to decide how you’re going to finish the raw edge of the hem. If you’re making yourself a tailored skirt or pants, you want to interface your hem to get a nice crisp edge. Cut strips of fusible interfacing the width of your hem and iron them to the inside edge of the fabric. If you want a softer look, skip it. If you have a serger, you can run a 3-thread stitch along the edge. If you don’t, you can stitch some seam binding, which is a very thin inexpensive ribbon, to the edge of the fabric. You can fold over ¼” of the edge of the fabric and stitch it down. That’s not as good a choice if the fabric is bulky because you might see a ridge from the outside of the garment when you press it, but with a quilter’s cotton, that would be fine.
After you’ve finished the edge of your garment, use a hem gauge or a small ruler to mark your hem. Carla Crim has a gauge you can print and cut out of a file folder, or you can buy a metal one. You use them to control the depth of the fold as you iron. Be careful not to burn yourself if you’re using metal because the gauge heats up quickly. This is one I do old school with an adjustable ruler gauge and pins before I go to the ironing board, but do whatever works for you as long as you get a nice even hem pressed up.
Now this is the tricky part. You want to fold the fold of the hem to the front of the garment so that the edge you finished is to your right and the inside of the garment is to your left. It should look like this : 
You’re going to be sewing on the finished edge, and every few stitches the machine needle is going to swing to the left and pierce the fold. Pin the hem in this position.
Next dig through your sewing machine feet and find the blind hem foot. I have two different styles. I prefer the one on the left, but they both get the job done. If your sewing machine only has a few utility stitches, odds are in your favor the blind hem stitch will be one of them, and your sewing machine most likely came with a blind hem foot. You can do a blind hem with a regular all-purpose foot, and I can pound a nail in with the side of my wrench, too. But a hammer works much better. So look for the right foot.
The blind hem stitch looks like a few straight stitches and then one zigzag.
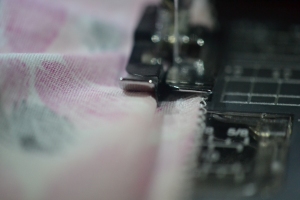
Line your blind hem foot up so it will help you keep your stitches so the straight stitches are only on the finished edge of the fabric and the zigzag pierces the fold close to the edge.
If you only have a very basic machine, you might not have as much control over the width of the stitch, but the manufacturer will have chosen a good all-purpose width. Start by locking your stitches, and then slowly sew around the bottom of your garment keeping your stitches as straight as you can and letting the sewing machine foot guide the fabric. Straight stitches on the inside edge of the fabric and a zigzag into the fold. Lock your stitches at the end. When you look at your hem, your stitches should look like this:
Now you want to take your garment to the ironing board. Gently stretch your hem into place. You should barely be able to see small vertical stitches from the front of the garment. Use your iron to press the hem out flat by using a motion that starts a few inches above the top of the hem and sweeps down to the hem edge and off the garment. As you get better at sewing blind hems, you will learn how to make the zigzag stitches show less and less. It takes a little practice. Can you see the hem?
A lot of pdf designers tell you to fold up your hem and just stitch around it. When the hem is straight and not a decorative detail to your garment, a blind hem is a more professional choice. It’s sturdy enough to be used on the legs of children’s pants and dresses, and once you get the idea of how it’s done, it’s no harder than just a row of straight stitches. When you’re sewing for yourself, learning how to do a blind hem is essential if you don’t want the “loving hands at home” look.
If making a blindhem is new to you, give it a try! Make me proud of you.


Thanks for the great information Roberta!
LikeLiked by 1 person
Thanks Roberta! I have never been afraid of blind hems (I think too much of a novice to know to be scared) but I sure didn’t know WHEN to use them! Looking forward to more!
LikeLiked by 1 person
This is a great blog, it is like a refresher course for me. I had sewed for a long time and then stopped sewing for many years and I feel that I do not have the skills and confidence yet that I had when I was younger . Maybe I still have the skills I just need to brush the cobwebs of them. Can’t wait for your net subject.
LikeLiked by 1 person
OMG! I am jumping with delight! Just mastered this first go! No more hand hemming work pants for me. Thanks a million
LikeLike
You are very, very welcome!
LikeLike