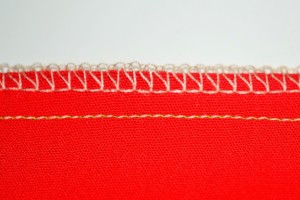
The first and foremost reason for finishing a seam is to keep it from fraying or raveling. Fabric cut on the true bias (a 45 degree angle from the selvages) and knits won’t ravel or fray so there is no need to finish those seams unless you want to for the second reason we finish seams, and that’s to make the inside of our garments look better. The third reason we finish seams, and this is very important for those of us who sew for children, is to make our clothes more comfortable. When we select a seam finish, all three reasons should come into play.
One of the primary reasons a home sewist purchases a serger is to finish her seams. She can sew and finish her seams in one step with a 4-or 5-thread safety stitch,
sew the seam on her sewing machine and then serge the seam allowances together with a 3-thread run.
Or she can sew the seam on her sewing machine, press the seam open, and then serge the seam allowance edges separately.
Without a serger, she can do similar things on her sewing machine and fulfill the need to keep her seams from fraying quite well, but her garment will not have the RTW look on the inside. There are stitches designed for finishing seams, but a simple zigzag will work. Before seamstresses had zigzag stitches, they used pinking shears, and we still can.
With the influx of sergers into the home market, a lot of sewists have opted out of learning some of the seam finishes used in higher end clothing. It’s too bad because these finishes can make the inside of our garments truly as beautiful as the outside. An unlined jacket with Hong Kong seams looks absolutely lovely draped over the back of a chair inside out. Not only do these seam finishes look gorgeous, though, they also add to the longevity of the piece of clothing. If you’d like your granddaughter to wear a dress you’re making for your daughter, you want to take the time to do French seams. If you want the jeans you make to wear as long as a pair of real Levis, then you want to learn to flat-fell your seams.
So put the serger away for a bit, and let’s learn how to so some fancy seam finishes.
The French Seam
A French seam is a beautiful thing. It takes time. You have to sew every seam twice and do three or four passes with the iron. They are so worth it. A traditional French seam is only done on straight seams.
1. Pin your fabric wrong sides together. Sew a very narrow seam.
Press the seam as you sewed it to set your stitches and remove any microscopic puckers.
2. Trim the seam to about 1/8″.
3. Press the seam to one side. It doesn’t matter which one.
4. Pin the seam right sides together. Use a knitting needle, skewer, point turner, etc. if you need it to keep the first seam you sewed straight.
5. Sew the seam using the seam allowance called for in your pattern. *
7. Press your seam toward the front or the back based on your pattern’s design.
Now you have a seam with the edges completely enclosed. No fraying, no scratchy serger threads, and built to last.
I use French seams on the side seams of most skirts, to join ruffle segments, some sleeve seams, and always, always always when I’m making a seamed scarf.
* If you’re sewing a gathered skirt or ruffle, you don’t have to make any changes when you cut out your fabric. If the garment is fitted, you need to add the width of the first seam you sewed to the edges of the fabric.
Part Two of Seam Finishes will appear next Wednesday. Beginning this week Saturday’s blog posts will feature requests from all of you. So if you have a topic you’d like me to cover, leave me a comment here.


I’d wear your sewing wrong side out. 🙂
LikeLike
Nana would be proud to read that.
LikeLike
I will be following! How would I do an enclosed or a French seam on my skirt/bodice seam? After I sew my gathered skirt to my bodice I usually serge it. I would love to finish the seam a different way!
LikeLike
You can’t really do a French seam when one side is gathered because the seam is too bulky. If the bodice is lined, I enclose the waist seam in the lining. If I’m topstitching the waist seam, I sew the wrong side of the skirt to the right side of the lining. Then I turn the seam allowance under on the bodice and topstitch it close to the seam, attaching the bodice and enclosing the seam in one step. If I’m not topstitching, then I sew the skirt to the bodice and then slipstitch the lining to the waist.
LikeLike
“An unlined jacket with Hong Kong seams looks absolutely lovely draped over the back of a chair inside out.”
You inspired me! I made a little kimono pattern and am going to do HK seams. And they are gonna be beautiful! About to cut into the fabric.
LikeLiked by 1 person