
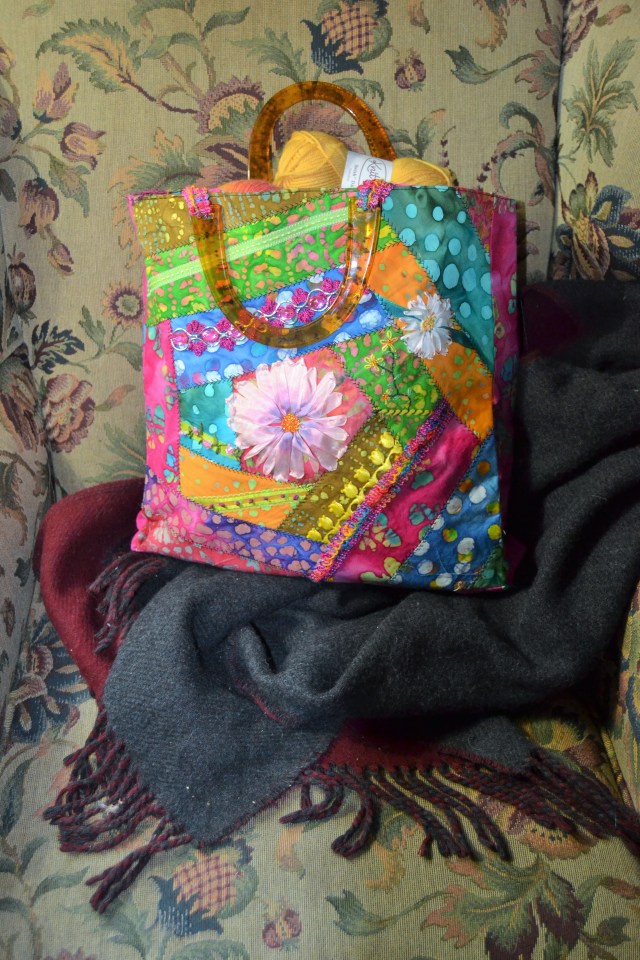
My Favorite Knitting Spot
Crazy quilting became “all the rage” in the US after people saw something similar done in the Japanese Pavilion at the Philadelphia Exposition in 1876. While traditional quilting is usually done with regular shapes, crazy quilting is done with bits and pieces of fabric with no particular consistent size and shape. Fancy Victorian ladies used pieces of velvet and silk, but today we make them out of anything we have scraps of. Most quilts have a patchwork layer, a middle layer of batting, and a backing. Then the three layers are stitched through. A crazy quilt is usually just a patchwork layer and a backing making it a great first quilting project. Measuring accurately and maintaining a consistent seam allowance are also not particularly vital.
The bag we’re going to make is 13″ x 13″ x 3″, but you can easily make your bag larger or smaller. Rather than work with tiny pieces of fabric, we’re going to simplify things by using a strip quilting method.
Materials needed
- 1/2 yard of muslin
- 1/2 yard of lining fabric
- Scraps for quilting at least 4 different fabrics
- 1 yd fusible or nonfusible interfacing
- Bag handles
- Scraps of ribbon, lace, etc for embellishing your bag with trims, (optional)
- Thread for sewing (white or off-white is fine)
- Thread for machine embroidery in a contrasting color (regular sewing thread is fine)
Tools
Sewing machine
Rotary cutter and mat, but just scissors are fine
Ruler
Iron
A piece of cardboard or plastic to cut a template
Pencil or fabric marker
Basic sewing gear
Making Your Crazy Quilt Squares
- Cut your muslin. This will be the “bones” of your bag so take the time to measure accurately. You want these pieces to be squared. For a 13″ square bag you need to cut two 13 1/2″ squares.
- Look through your fabrics and decide which fabric is going to be the focal point of your design. You don’t have to choose the same fabric for both sides of the bag. If you have a fabric with a large design, it might make a nice choice. If you plan to embroider your bag, a fabric that would be a good background for the pattern would work.
- Use the cardboard or plastic to create a template for the starting point of your quilting. If you’ve never done this before, a five-sided piece is an easy one that still creates an interesting piece. Do not make all of the sides of the template the same size. You want it to be irregular. The size of the piece is up to you. Remember approximately 1/4″ all around the edges will end up inside a seam.
- Place the template on your fabric(s) and trace around it. Cut out the pieces.
- Decide where you want these pieces to be on your bag. They don’t have to be centered. Secure them down on the muslin with pins or spray adhesive. Stitch around the edges of your pieces to secure them. Clip your threads and give your muslin a quick press.
- Cut or tear the rest of your quilting pieces into strips of various widths. For a bag this size 2-3″ strips work well. Press them nice and flat.
- Round 1- You’re going to be sewing a round of your strips on the edges of the focal piece of your quilt block. Take a few minutes to play with the pieces and decide how you want to place them on your quilt square. If you’re going to embellish your pieces with ribbons or lace, you need to plan that, too, because it’s important the ends of the trim are secured in the seams as you go.
 You can’t come back and do it at the end.
 - Pick a side of your center piece. Place one of your strips along the edge of your focal piece, right side down, edges matching. Stitch it down using a 1/4″ seam. Open the strip out and press it flat.
- Lay your ruler along the edge of an adjoining side of your focal piece. Using your pencil or marker, mark on your strip, continuing the edge of the focal piece across the strip. Cut along the line. Working around the focal point of your square, repeat with the other strips adding any embellishments you want as you go. Be sure to keep pressing.
- Round 2- You want to repeat round 1, but feel free to move the pieces to vary their shape. They don’t have to be lined up edge to edge.
- Round 3 and beyond. Keep adding rows until the entire muslin square is covered. Don’t be concerned if your strips end up hanging off the muslin. You can trim them off.
- When your square is finished, give it a good press and repeat with the other side of your bag.

Embroidering the seams of your bag
Using one of the sewing machines with an appropriate stitch and a contrasting thread, stitch along all of the seam lines carefully centering the stitch on the lines.
Next up – Assembling your bag
