

Piping a curve
Oh. my, there aren’t too many things that confound beginners like piping. Done right, piping can take a project from bland to Wow! On the other hand, nothing screams “loving hands at home” quite like poorly sewn piping. The important thing is, though, piping is another one of things that are so sew easy when you have the right tools and know how to do it. Piping is used in lots of places – children’s clothing, bags, and home dec projects are the most common.
You can buy piping pre-made. In the home dec department, piping takes on many forms. It can be fabric covered, braided and fringed. In the fashion department it comes in a few different sizes and colors, and sometimes you can get it in prints like gingham checks. If you learn to make your own piping, just about any fabric, print or solid can be any size piping you choose.
Anything that’s a long string, is flexible, and can withstand the same kind of laundering as whatever you’re making can be used as the filler cord for piping. Here are some of the things I use to make piping:
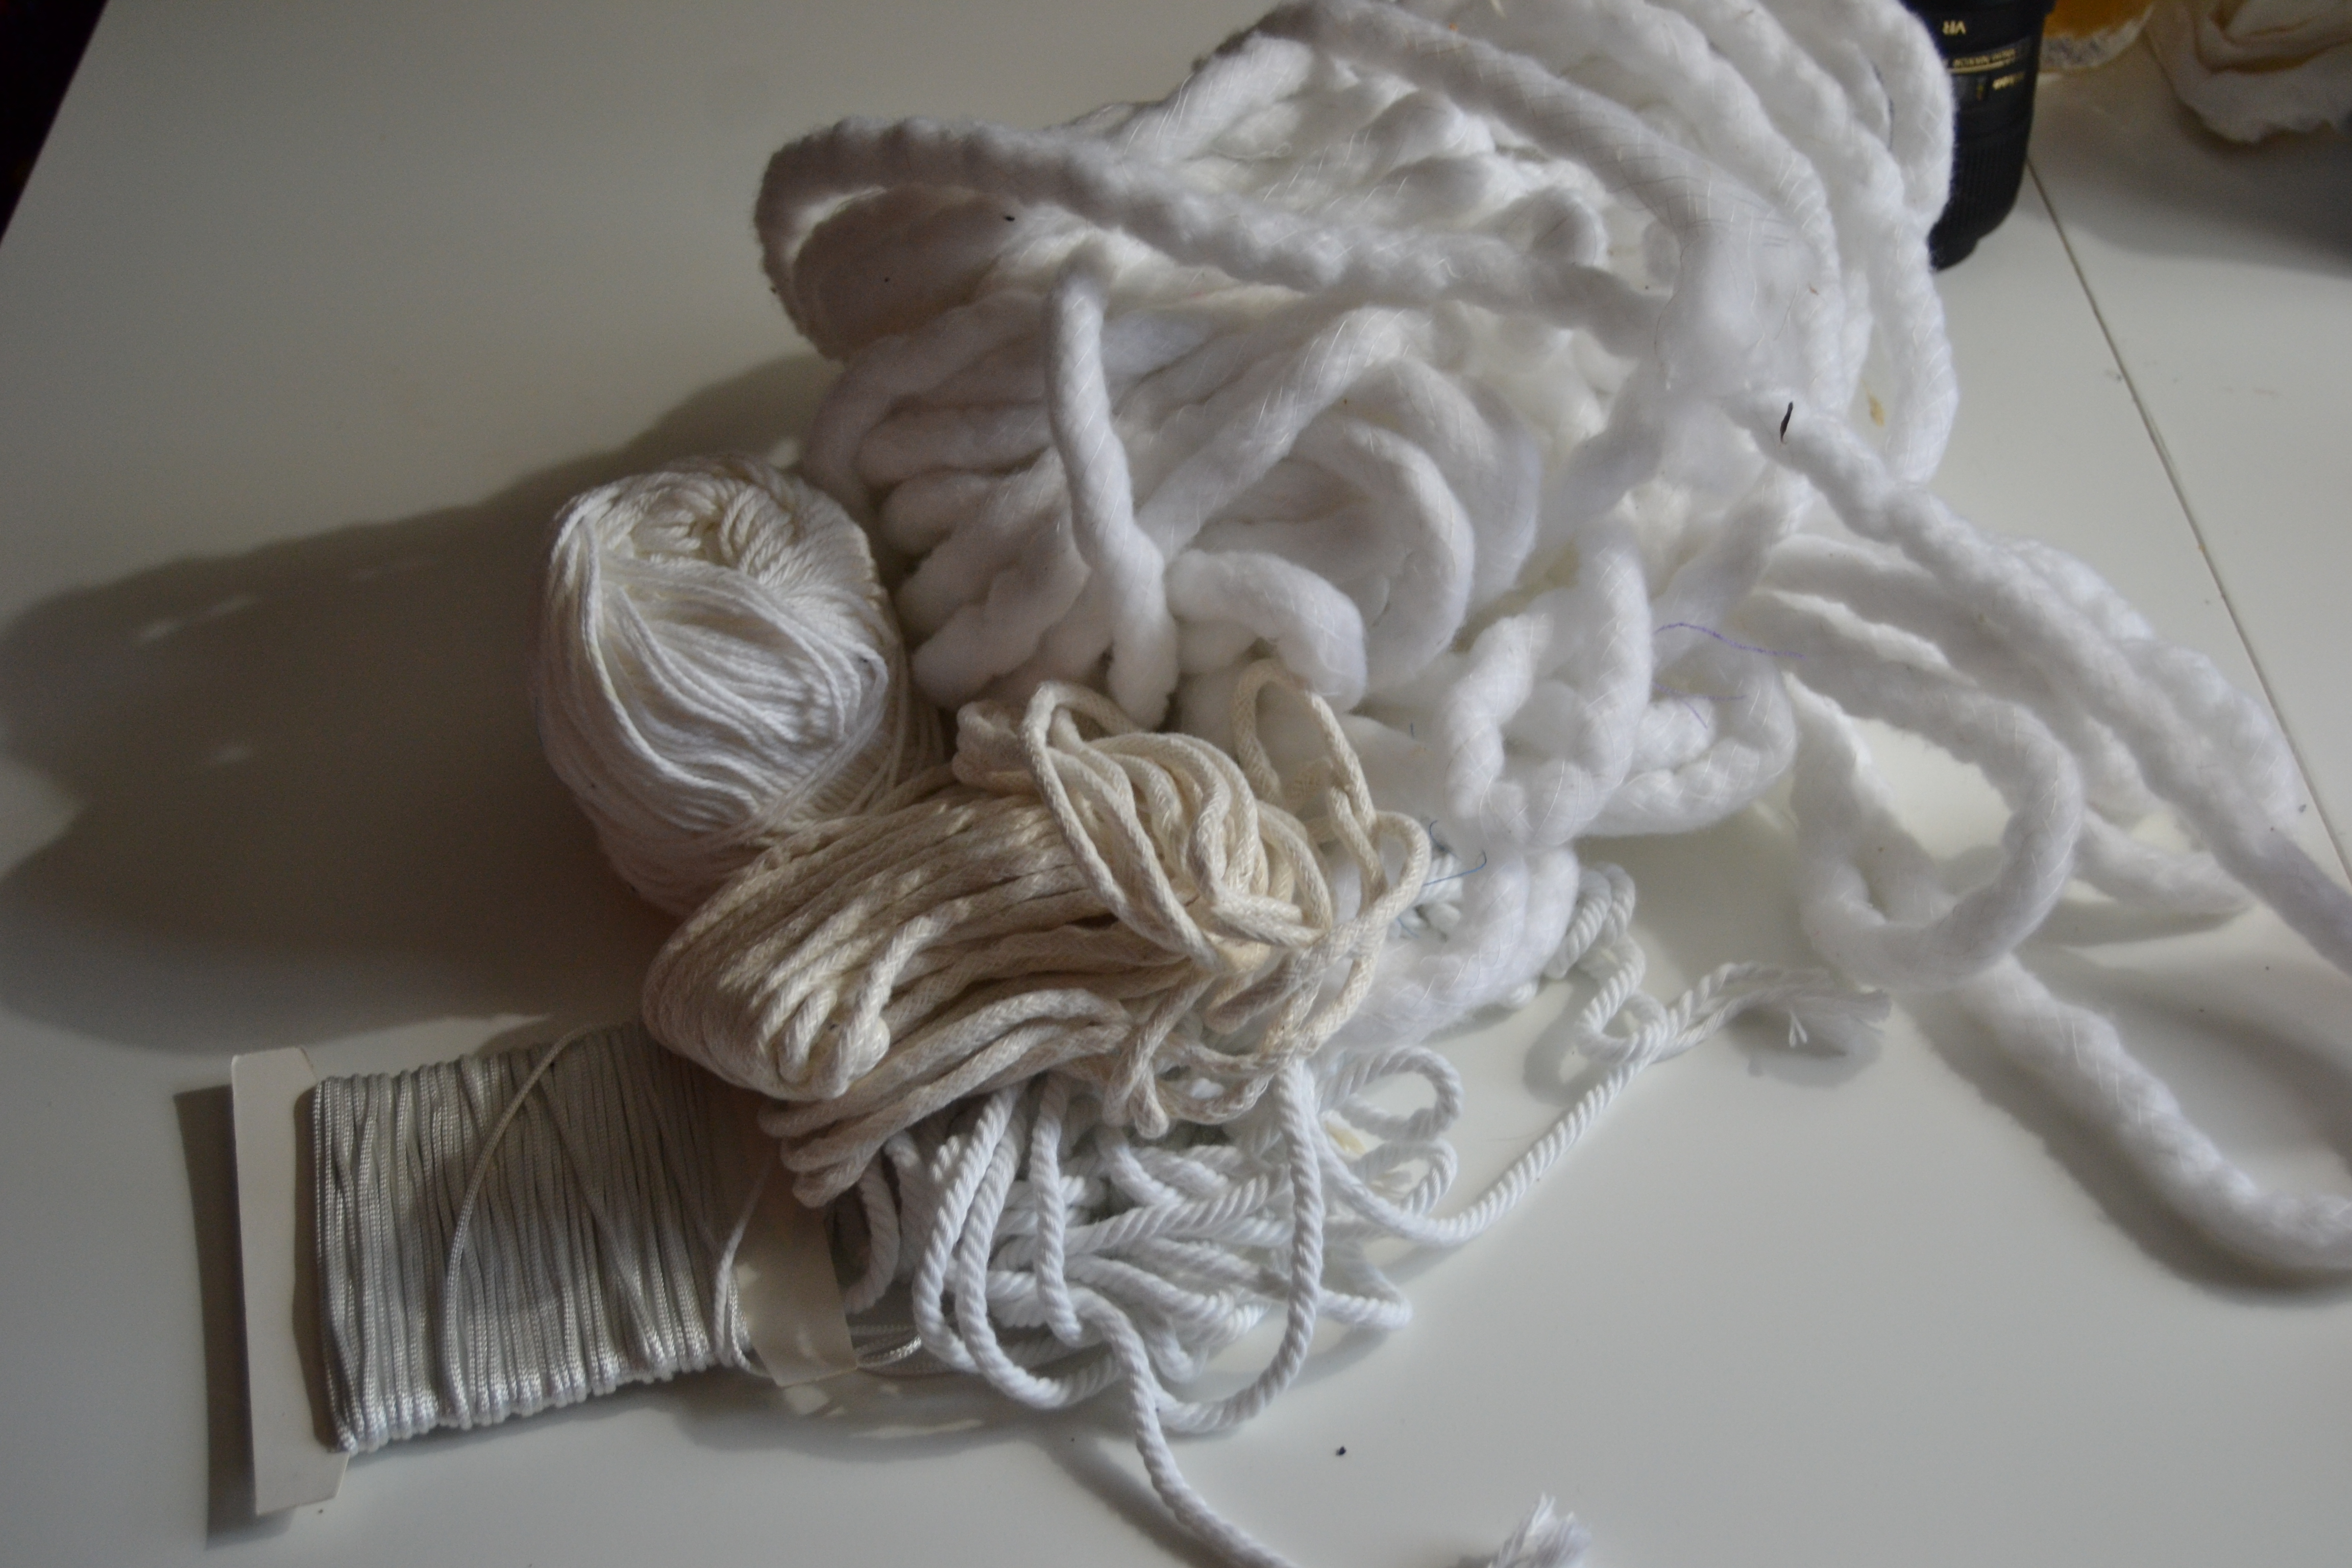
Piping Fillers
You either need a piping foot or a zipper foot for your sewing machine. A piping foot has a channel in the bottom the piping can slide through. It makes sewing the piping much easier. I have a piping foot for the most common sizes of piping I make, but when I make the jumbo piping, my zipper foot is fine.

Piping Foot Upside Down
Piping should be made with bias strips of fabric. If you’re short on fabric, and the piping will be attached in a straight line, you can make piping from fabric cut on the straight or cross grain of the fabric, but it is always preferable to use bias strips. If you need just a small amount of piping, use a ruler to cut enough strips to make the length you need. The strips need to be wide enough to cover the filler cord and give you the seam allowance times two.
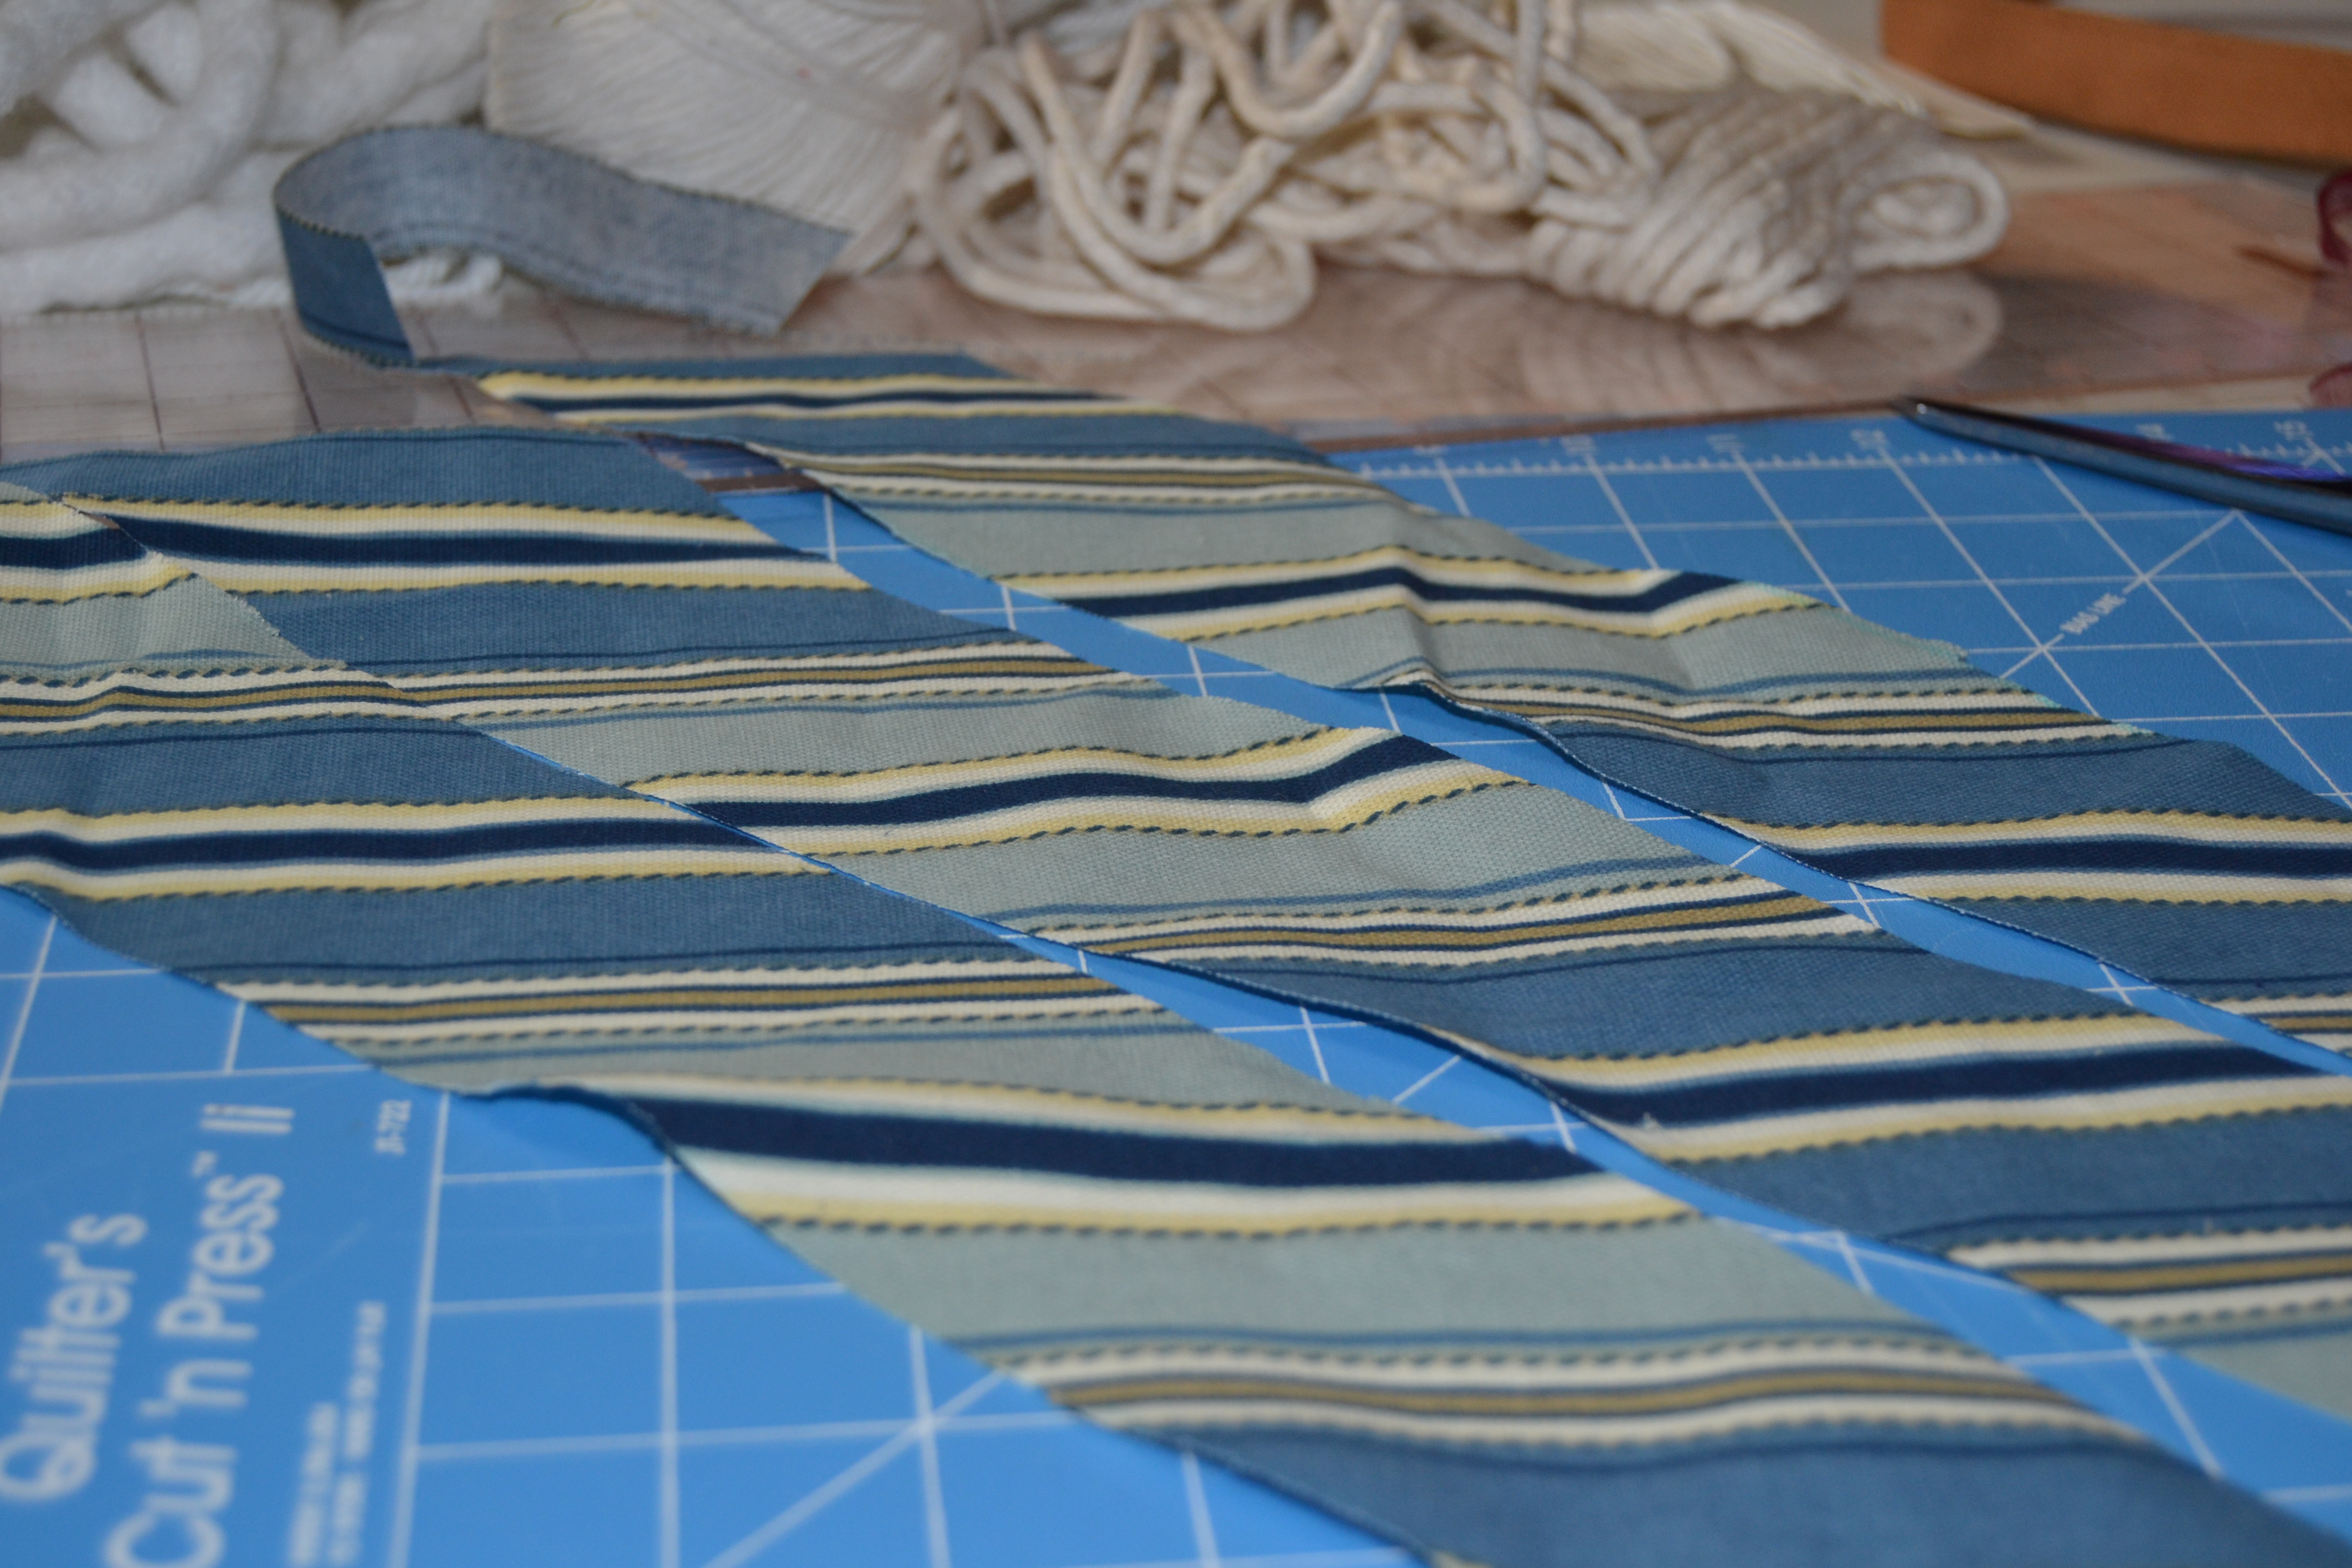
Bias Strips
If you need a lot of piping, see the lesson on Hong Kong seam finishes to see how to make continuous bias strips. https://takingitupanotchsewing.com/2014/08/13/seam-finishes-hong-kong-seams-bonus-how-to-make-continuous-bias-strips/
If you’re working with just a few strips, sew the strips together, sew them together at an angle so the line of stitching is on the cross or straight grain of the fabric. I’m using a stripe to make that easy to see. Offset the strips so you will have a straight strip when you’re done sewing it together.
Offset your strips by the same amount as the width of your seam allowance.
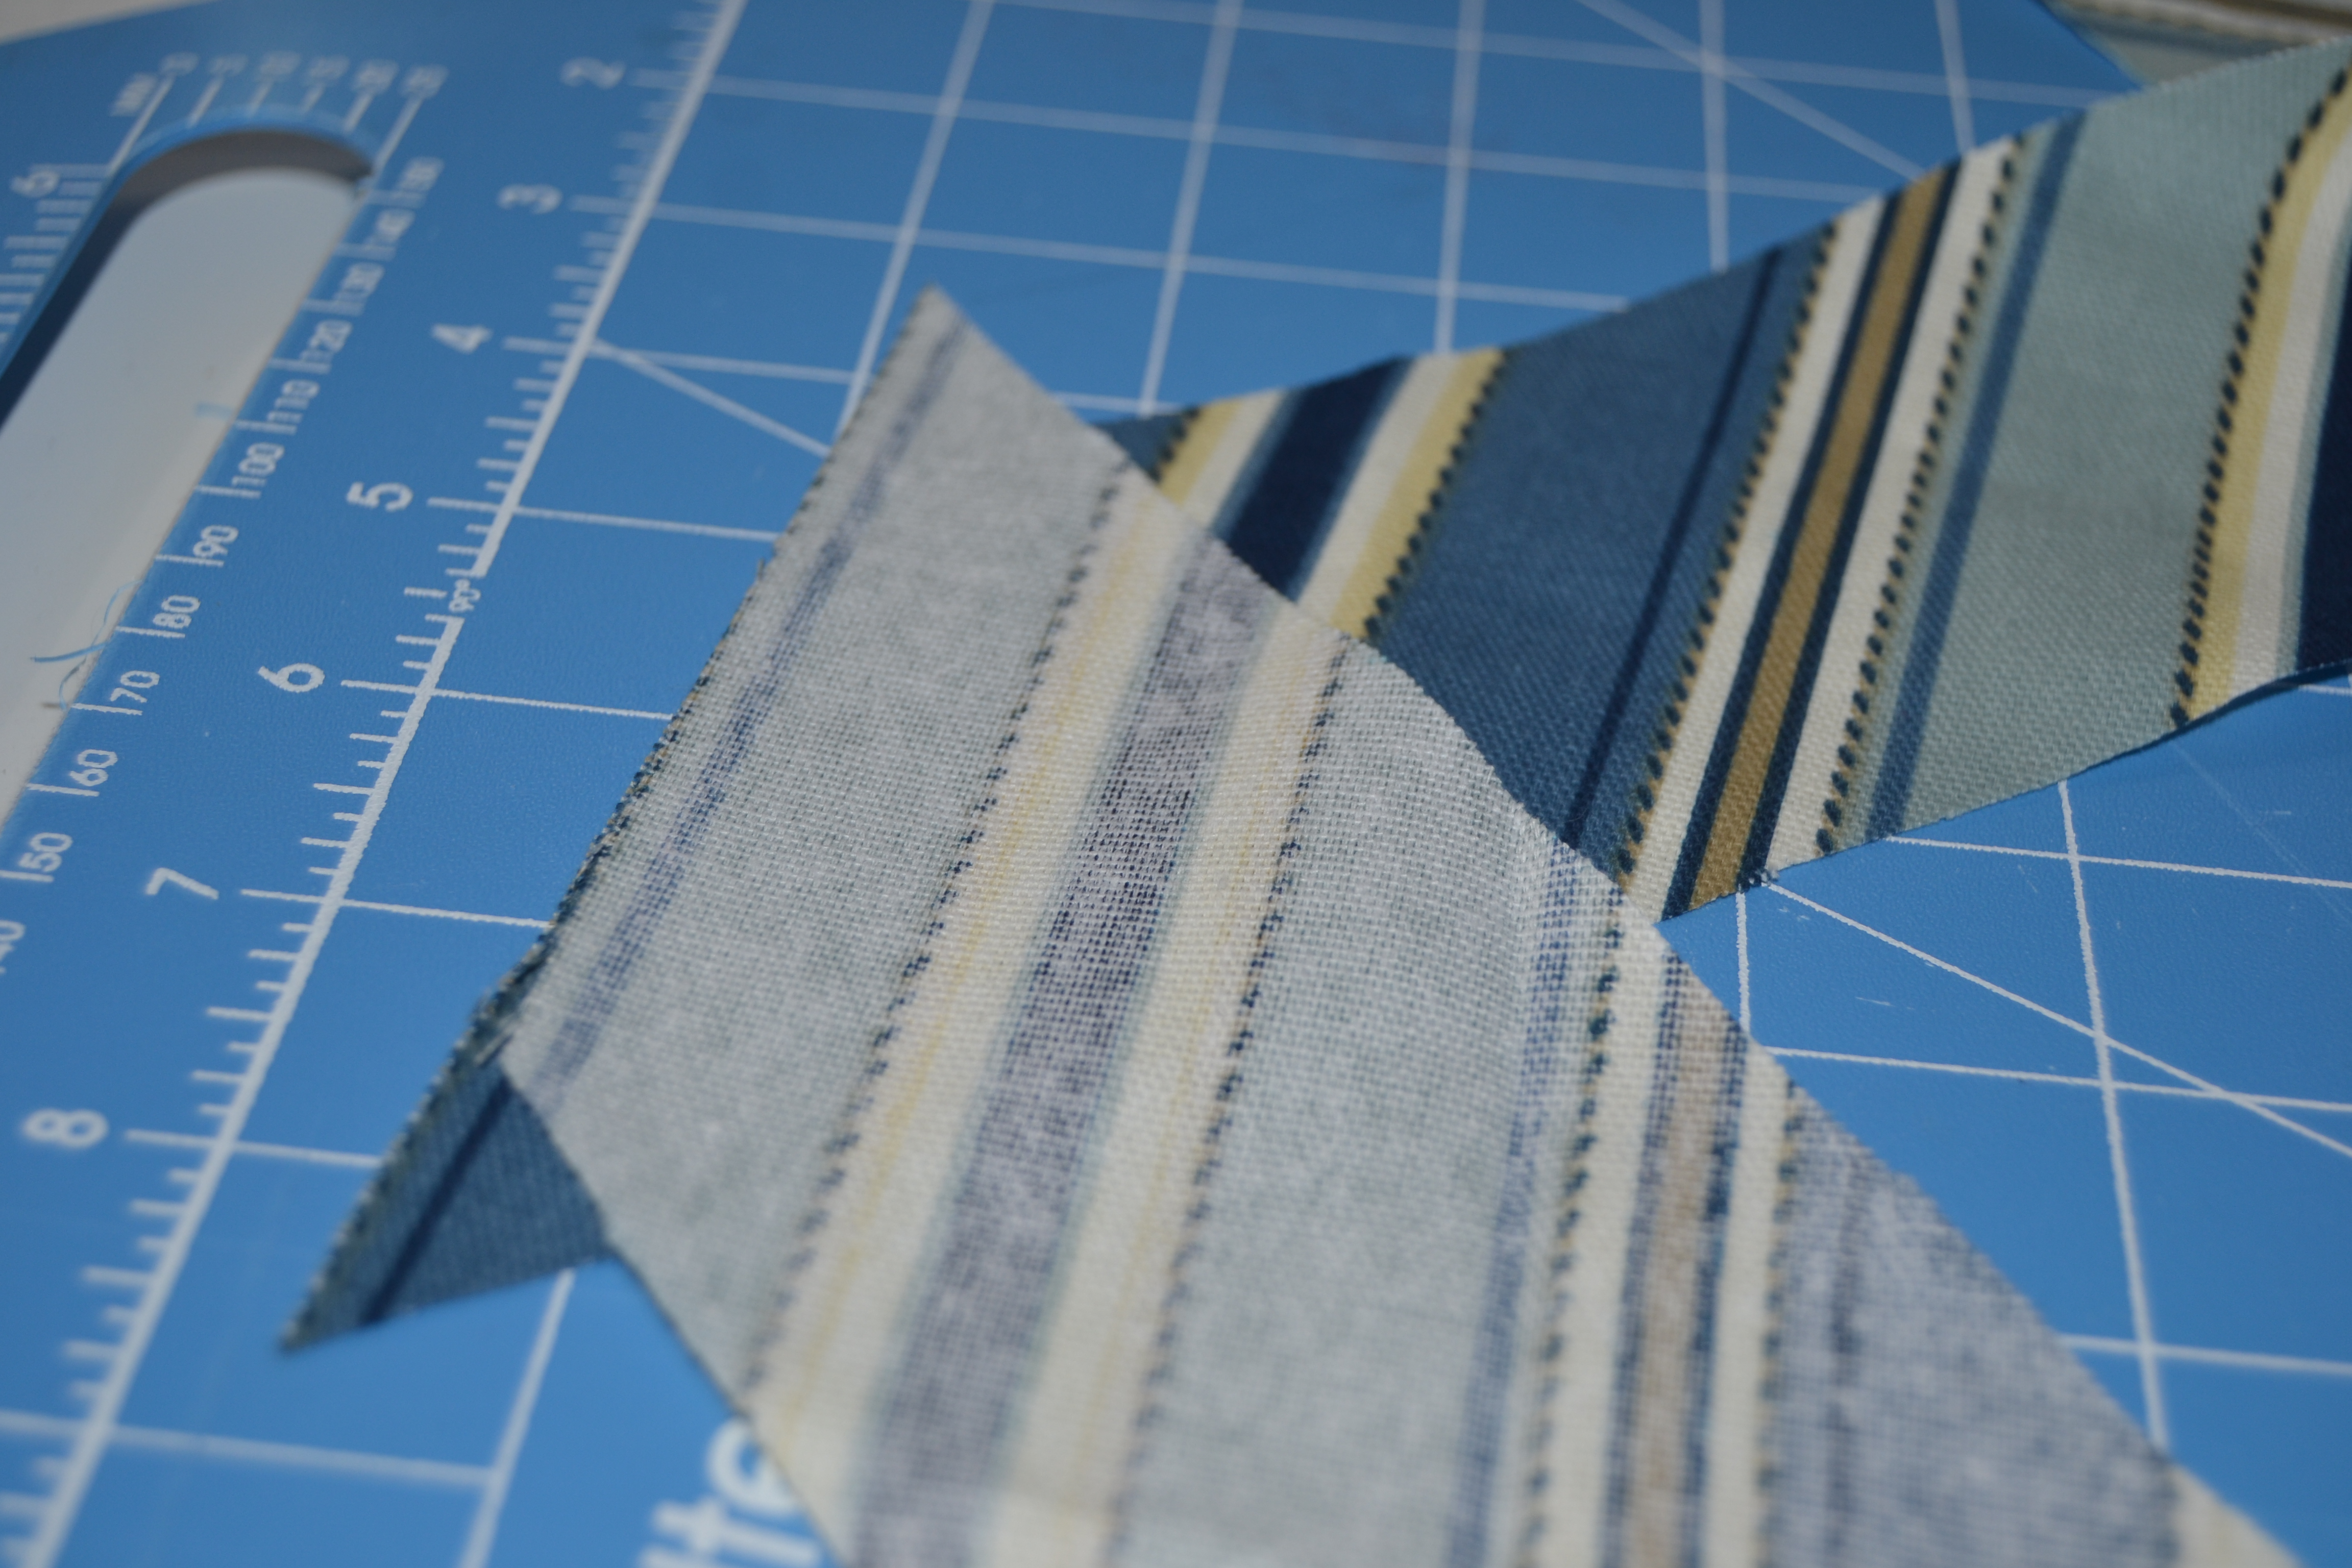
Press the seams open. Trim off the little “extra” triangles.

Press and trim
Wrap the bias strips around the filler cord so the edges of the strips line up.

Bias strips

Wrap the filler
Attach either the piping foot or the zipper foot to your machine. Adjust the needle until it is right up against the filler cord, then back it away a little. This is so when you attach the piping to your project, the stitches you made when you constructed the piping won’t show.
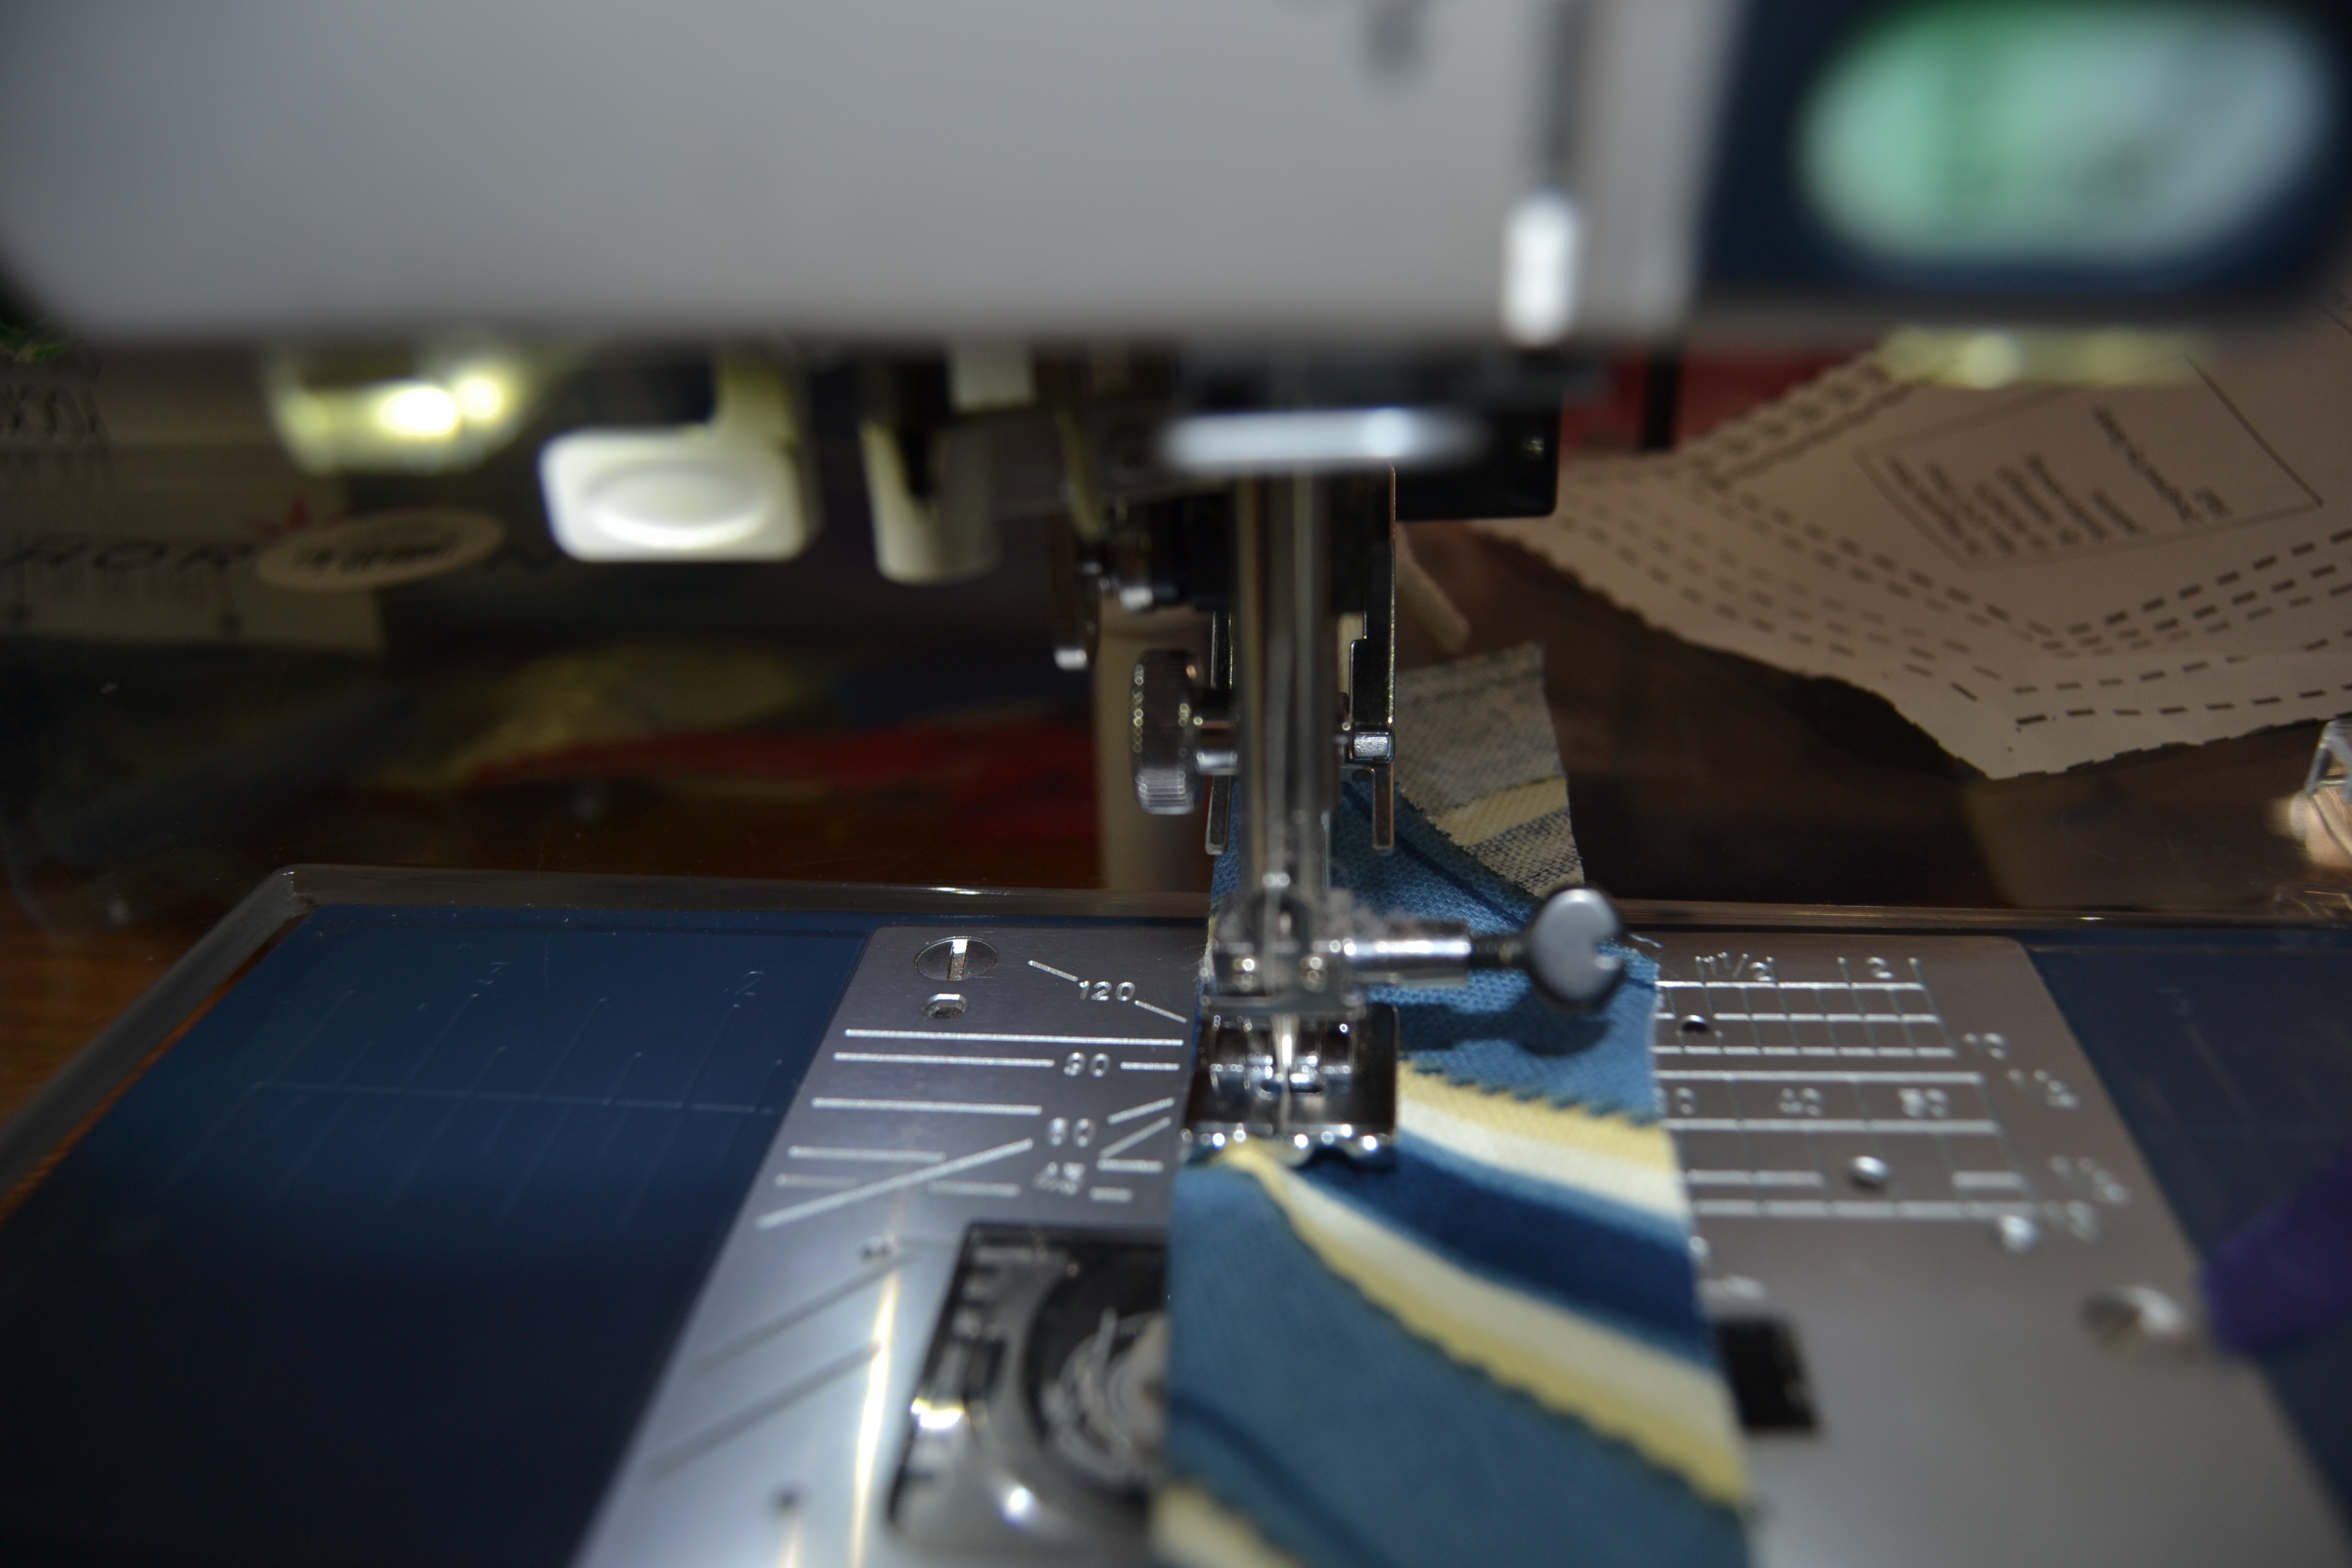
Using the piping foot
Sew down the length of the bias strip. I like to sew across the ends so I can’t accidentally pull the cord out.
Trim the seam allowance to make it match the seam allowance of your project.

Piping stitched
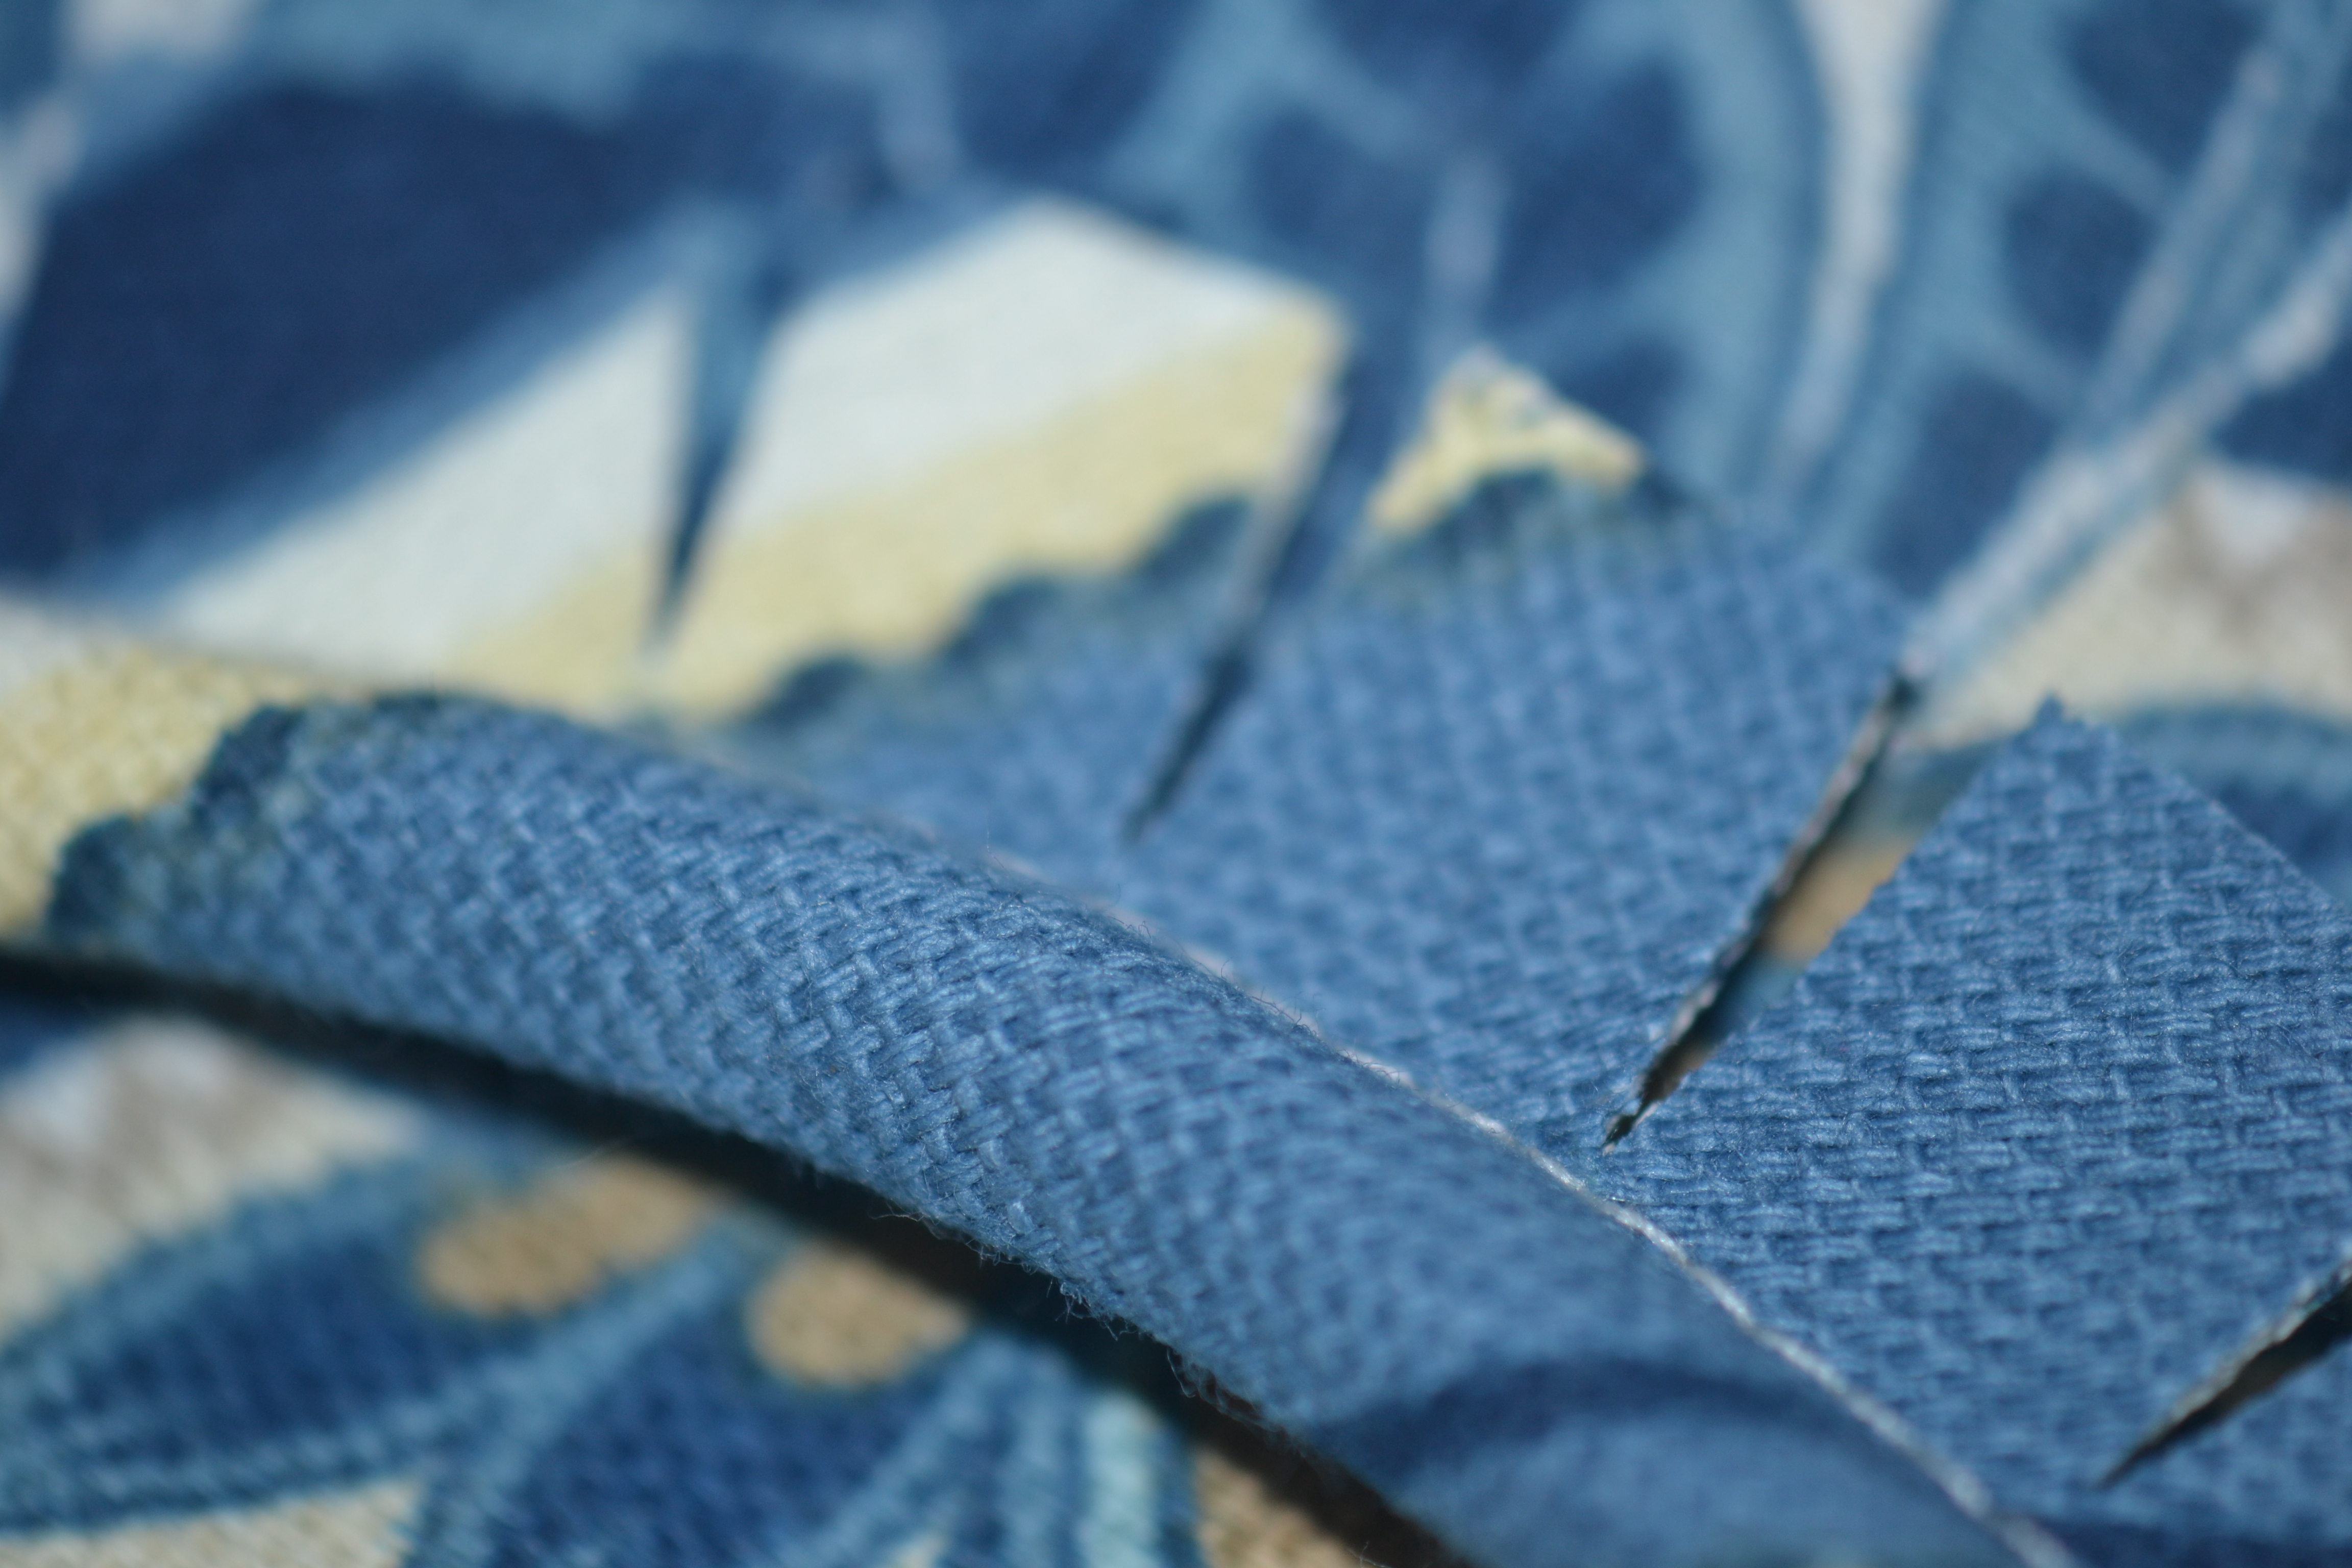
If your piping is going to be attached to a curved seam, clip into the seam allowance to your row of stitching every 1/4″ to a 1/2″.
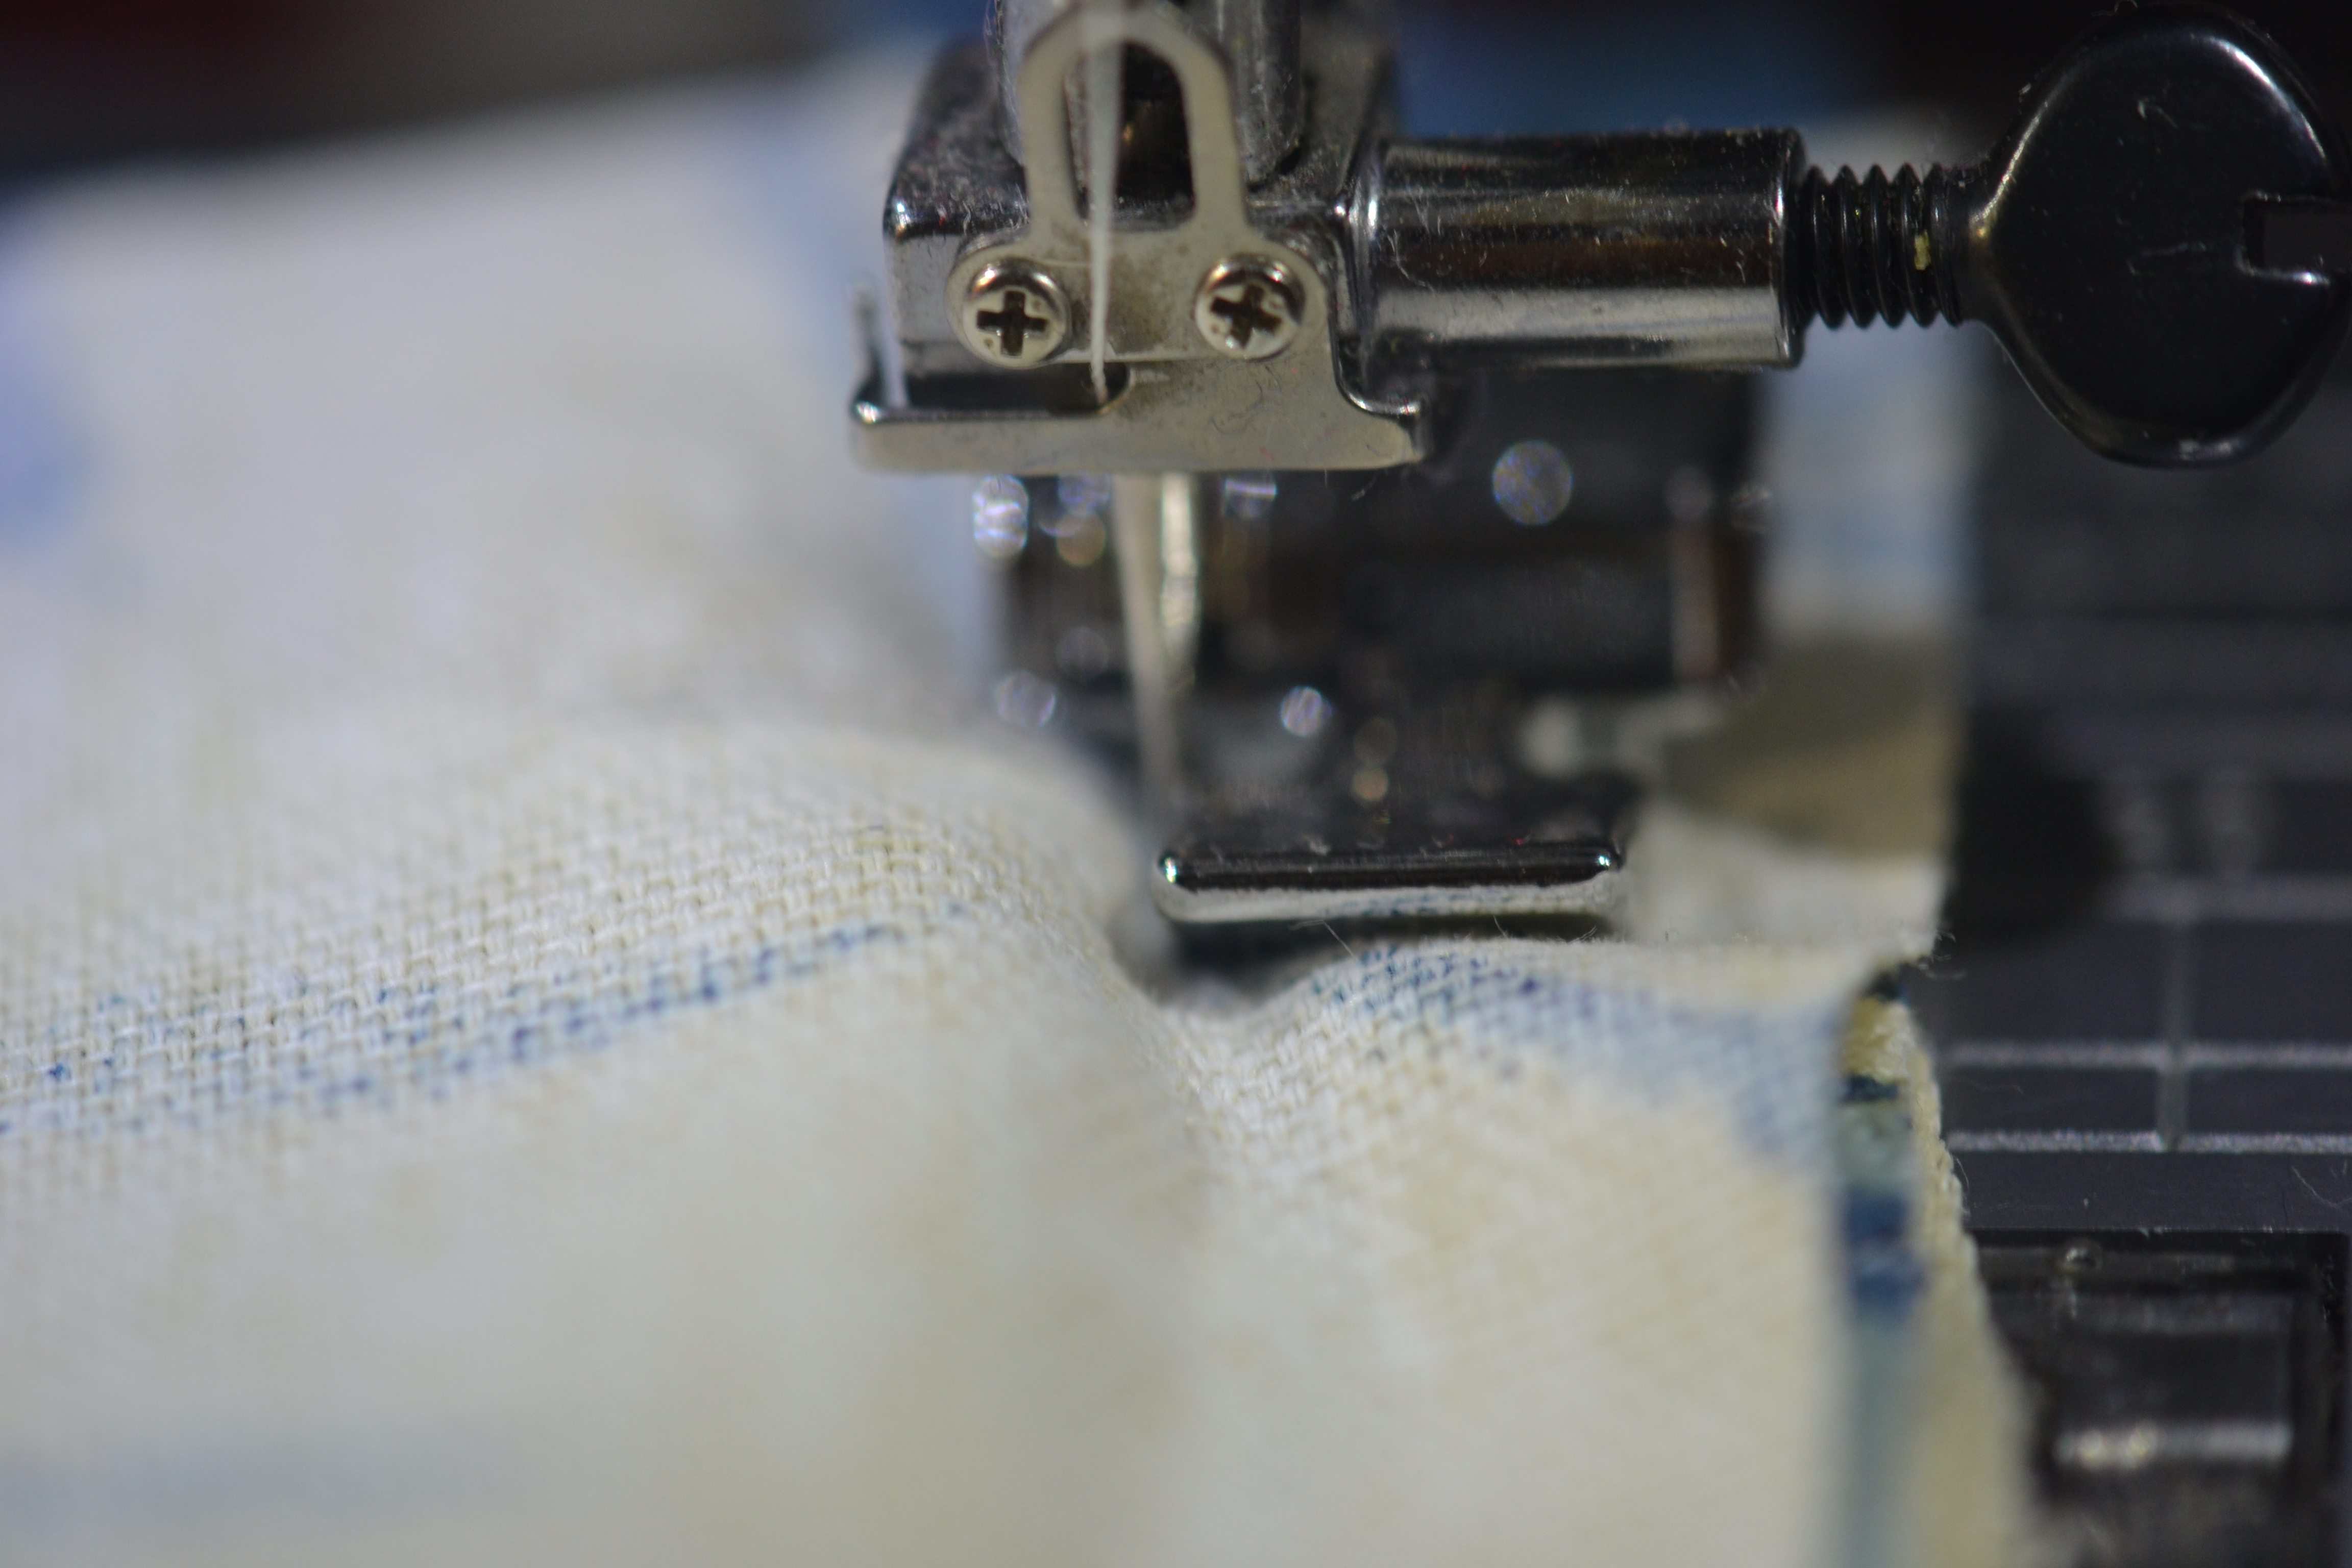
Pin the piping to the seamline of your project.
Move the needle on your sewing machine so it’s right up against the piping still using the piping or zipper foot.
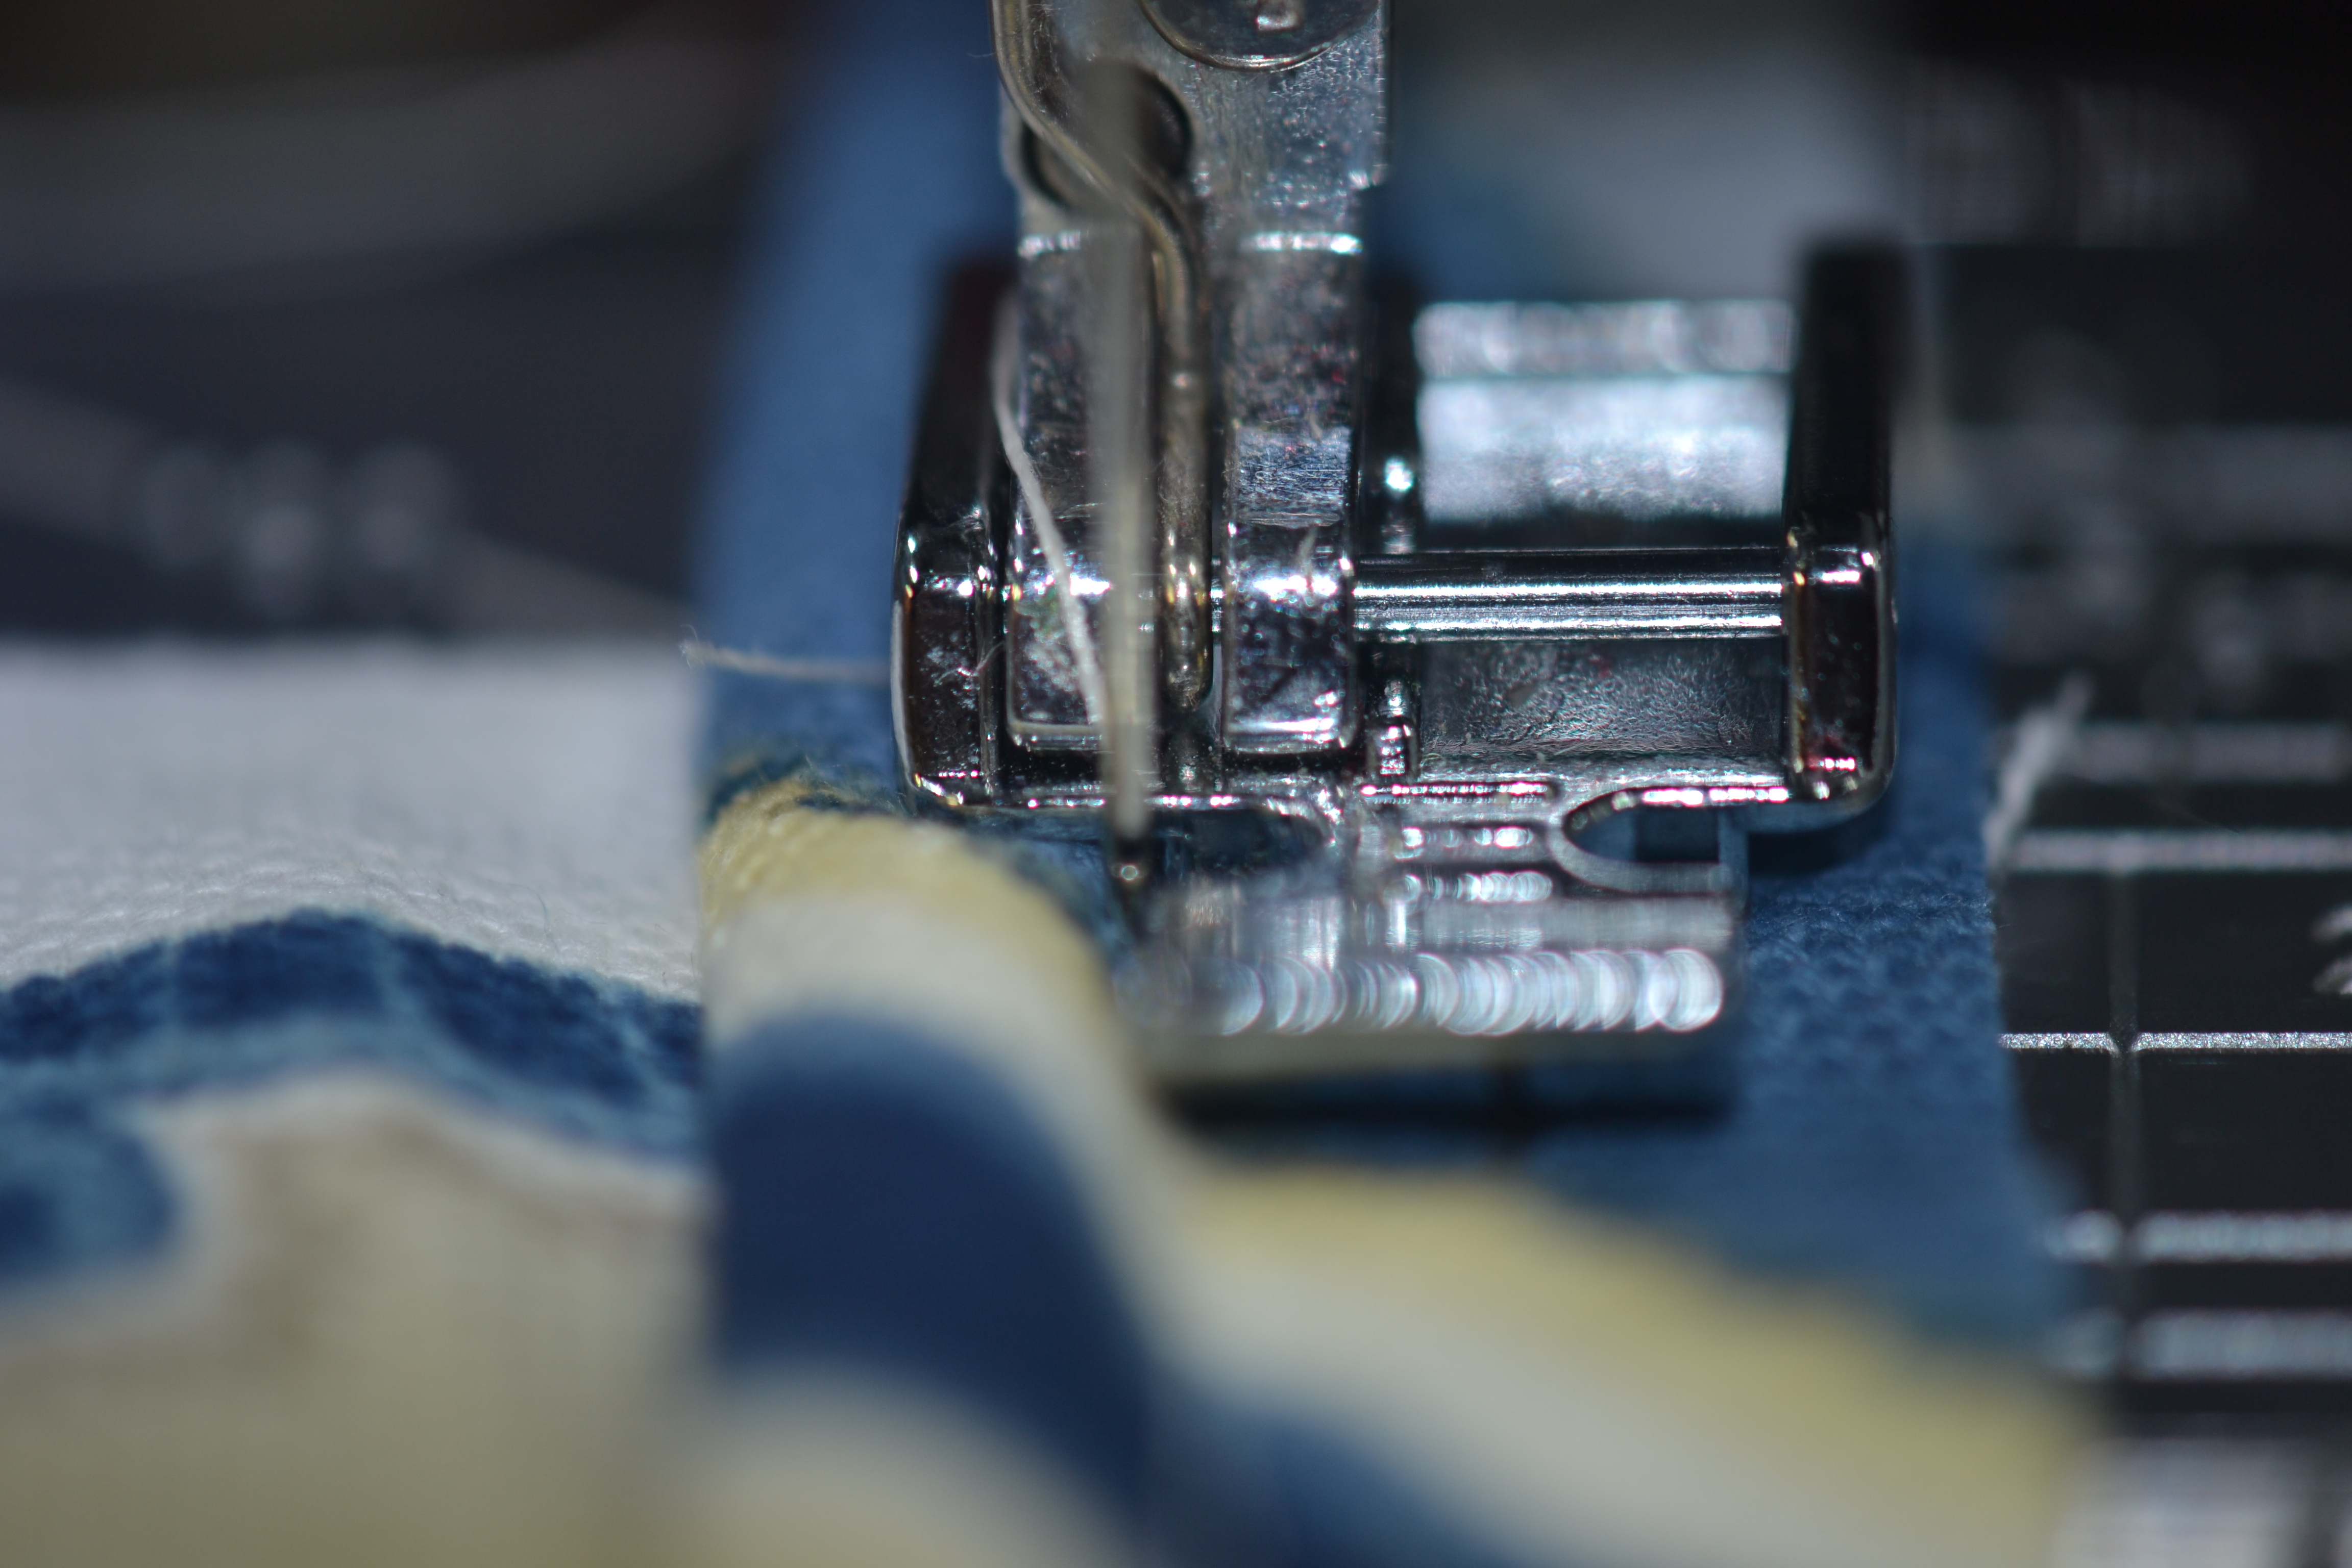
Using a zipper foot

Piping attached to one side
Now pin the fabric to the other pattern piece from the side where you can see the stitching line.

Pin on the same side as your previous stitching
Using the piping foot or zipper foot, carefully sew over the same stitching line.
Now you have your piping attached, your stitches don’t show, and the curves, if there any, are perfect.
Piping a curve
The next step to sewing beautiful piping is to learn how to join the ends together when you’re sewing it in a circle. See you next Saturday for that!

Which side do I pin the piping to when one side is gathered and one side flat?
LikeLike
I usually choose the flat side. When you’re attaching piping to a smocked piece, for example, you attach the piping to the yoke. Then attach the smocking.
LikeLike